A Practical Examination of eBay Rifling Buttons
Contributed by: PRKR
The Quest
I’ve been on a personal quest to make rifled barrels from scratch for several years now. Starting with a drill press, I’d eventually buy a lathe with barrel-making as the primary reason to justify that purchase. While I overcame many challenges that come with hobby barrel production, the one thing that has continued to haunt me for years is producing the rifling.
Rifling is the helical grooves on the inside of a barrel. They are what imparts spin on the bullet to give it stability in flight. Everything about making a barrel is simple and pretty much boils down to making a hole. That is, until you get to the rifling. Rifling involves making multiple grooves of a uniform depth, width, and twist, down the entire length of the bore. This is not something that’s easy to accomplish with standard shop tools or by hand.
I’ve personally tried broach cutting each individual groove with a custom mandrel using a rifling attachment designed for my lathe, and I’ve tried electrochemical machining (which is using an electrode that has a negative of the rifling to create grooves in a barrel with electricity and chemical reactions). These methods were not satisfactory, and I looked towards alternatives.
Button Rifling
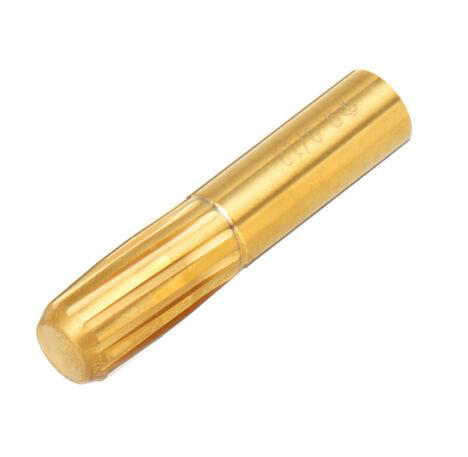
Button rifling is a forming process in which a hard piece of metal with rifling grooves is pushed through a bore, causing the metal in the barrel to flow into the empty spaces in the button and move away from the raised portions of the button. As the button moves down the barrel it turns on its own, creating helical ridges known as rifling. For the same reasons it’s hard to make helical grooves inside a bore, it is also difficult to make them on the outside of a cylinder. This, coupled with the difficulty of machining the incredibly hard material that buttons need to be made out of, made it impossible for me to simply make my own button.
However, cheap foreign rifling buttons have recently appeared on eBay. Since I was rapidly running out of alternatives, I decided to pick one up and give it a try, and in the process talk a little about them. If you’re considering purchasing one read through the whole article because there are some pretty important details you should be aware of.
NOTE: I purchased this button with my own money and am in no way being influenced by any eBay seller.
What’s Out There
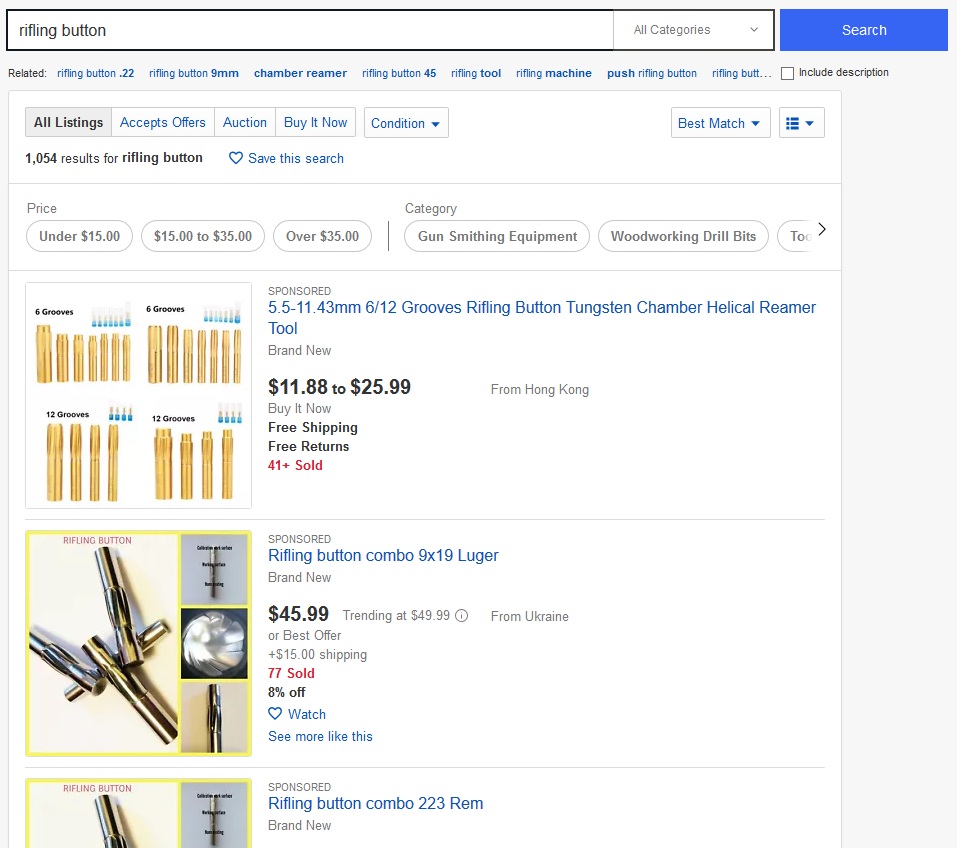
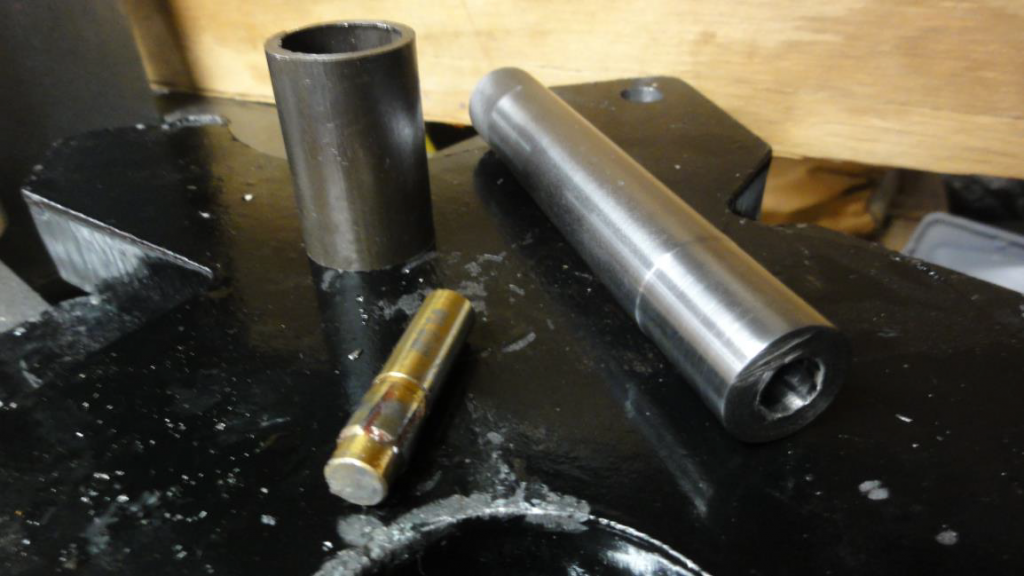
There are two main types of buttons you can get from eBay: Ukrainian and Chinese (Hong Kong). The Ukrainian buttons are made out of tool steel and have a “nano coating”. The Chinese buttons are made out of carbide and have a titanium nitride coating. As carbide is very hard, and therefore brittle, it does not work well with shock. You cannot hammer a carbide button through a barrel without risk of shattering it. You need to use a hydraulic press or some other method that does not shock the button. Since I already had a hydraulic press, I decided to go with the carbide.
I ordered from the seller ‘topestore48‘. They had 7 different calibers to choose from; 5.5, 5.56, 5.6, 6.35, 7.62, 9.0, and 11.43 and four different styles of buttons in those calibers. Style one and two were 6 groove buttons, one had a boss above the rifling itself and two did not. Three and four were 12 groove buttons, and like the 6 groove options, three had the boss and four did not.
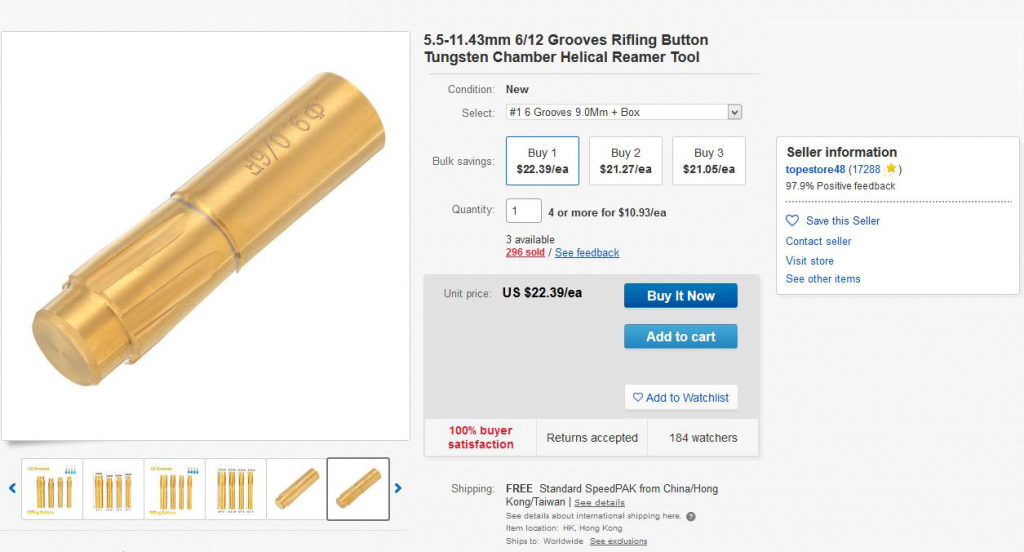
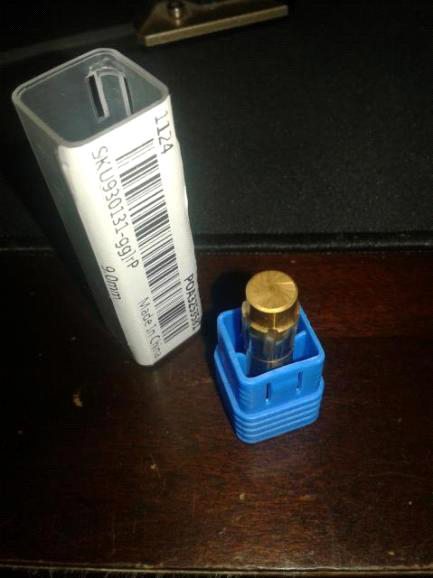
I ordered option one, a six groove 9mm button with a boss. 16 days later the button arrived in the mail.
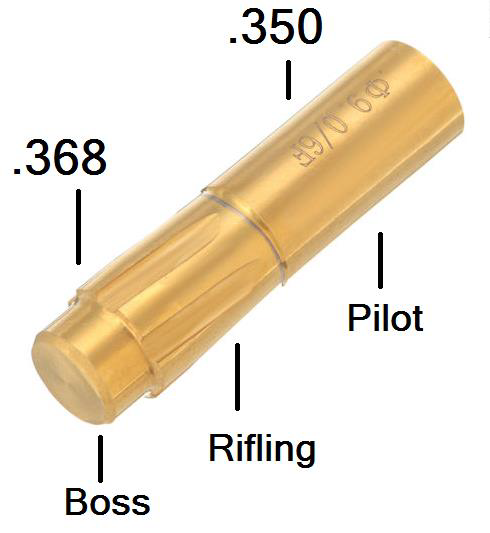
Since there were no advertised dimensions other than “9.0mm” I took some measurements when it arrived. I wanted to see what the rifling was checking at. The pilot diameter was .350 and the rifling diameter was .368. This was strange to me as I already knew that the SAAMI spec for 9mm was a .346 land and .355 grooves. I took a moment to consider this, recalled that China is a combloc country, and came to the realization that I had a button designed to rifle a 9mm Makarov barrel.
Rifling the Barrel
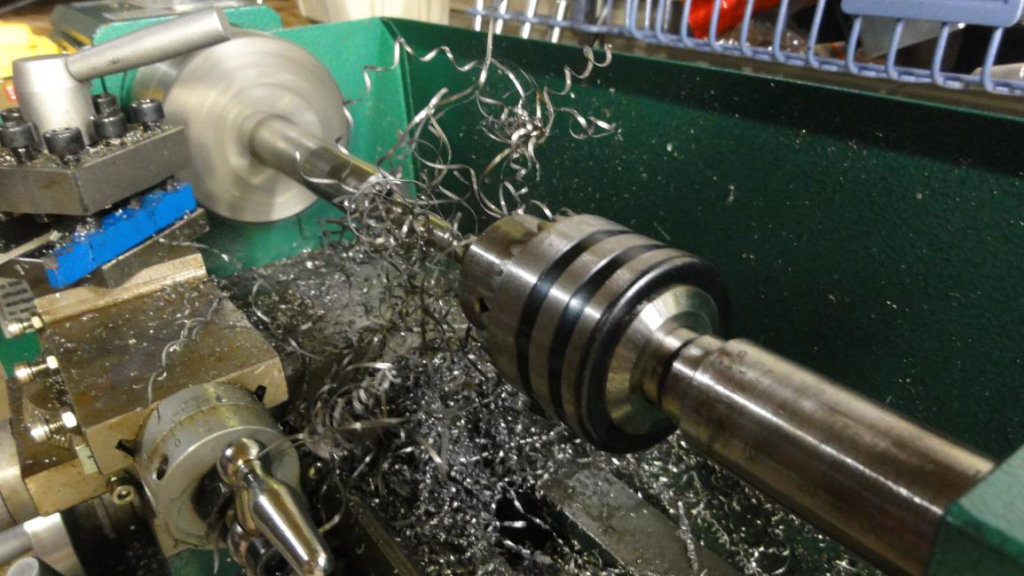
Despite the size snafu I pressed on and worked within the new parameters. Instead of reaming to the SAAMI spec of .346 for 9mm Parabellum, I reamed to .351. Just large enough for the pilot to fit in the bore. (Do not try to press a button through a hole if the pilot won’t fit)
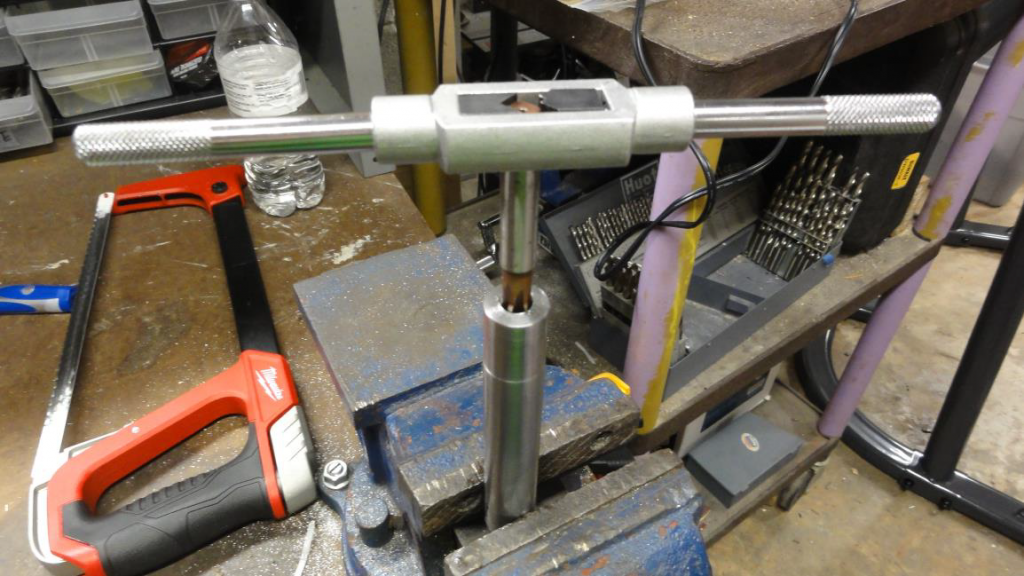
With reaming completed we can press the button through the barrel. This is a pretty simple operation so I won’t go into too much detail. Make sure you put the pilot in barrel so the rifling and boss remains on top. Make sure to lubricate the button! I just used some cheap Walmart brand multi purpose grease.
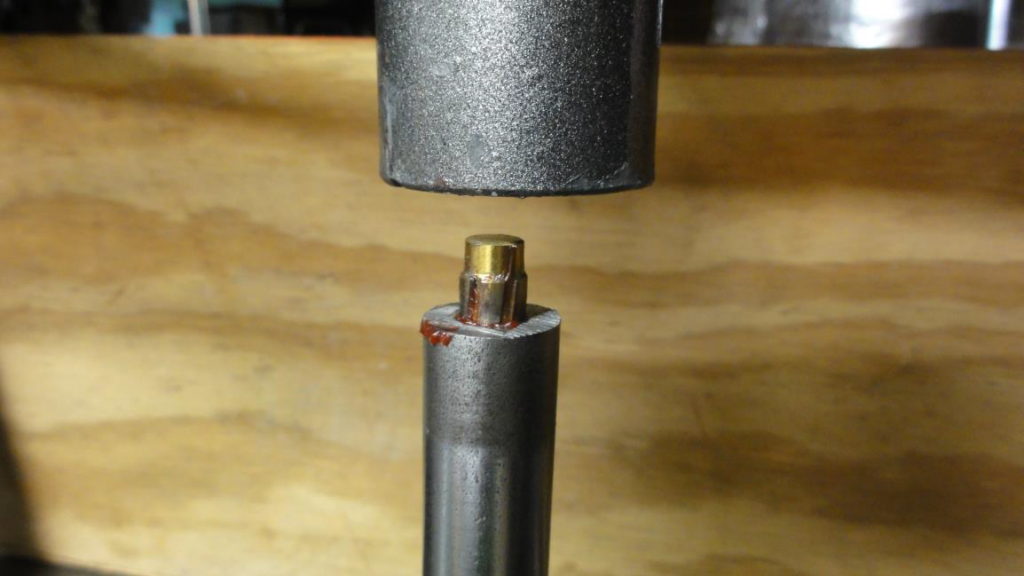
After you press the button in to the point where the boss is flush, use a small disc to press it below flush.
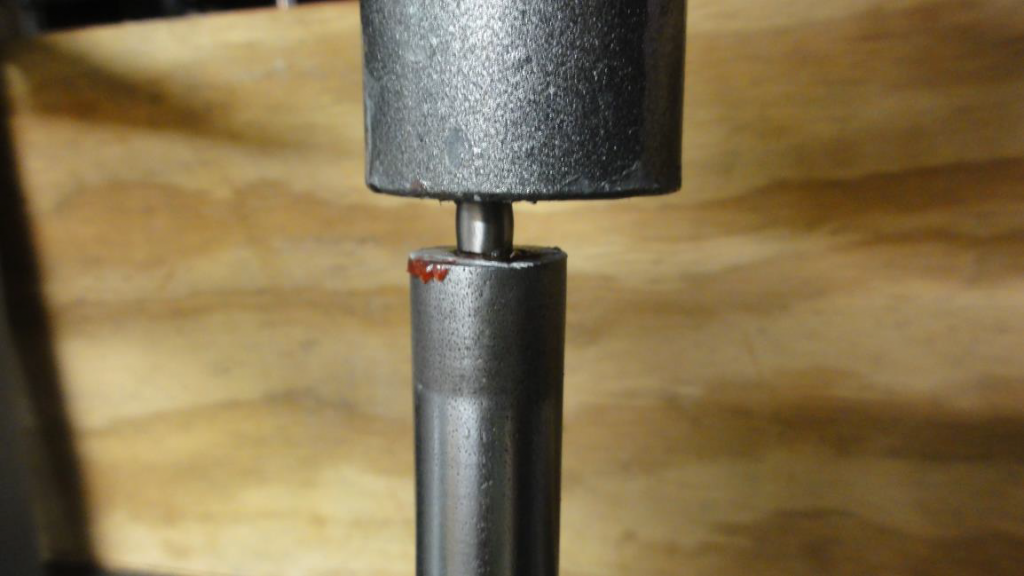
Once the small disc has been removed switch to a longer pin.
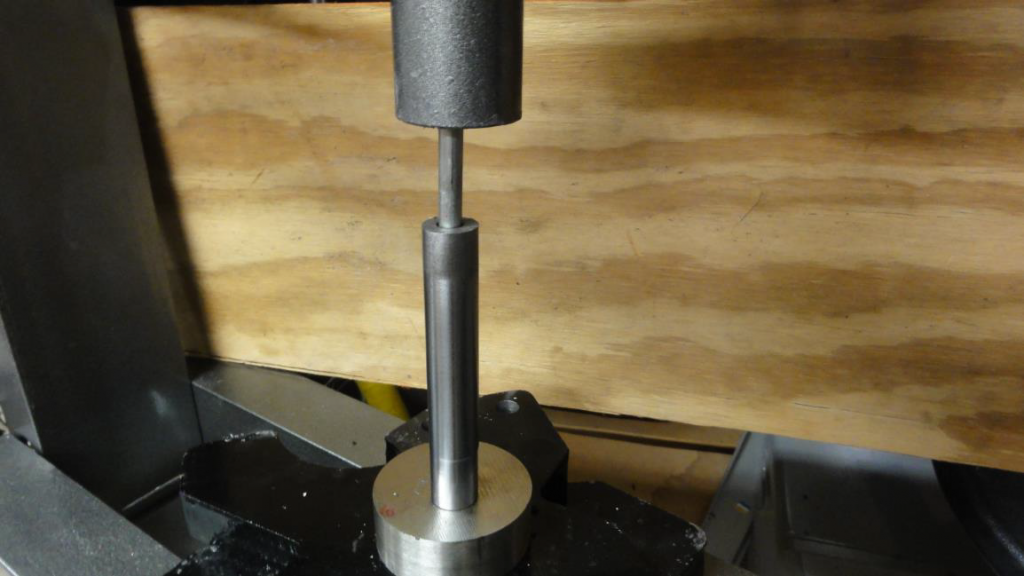
Now simply push the button through.
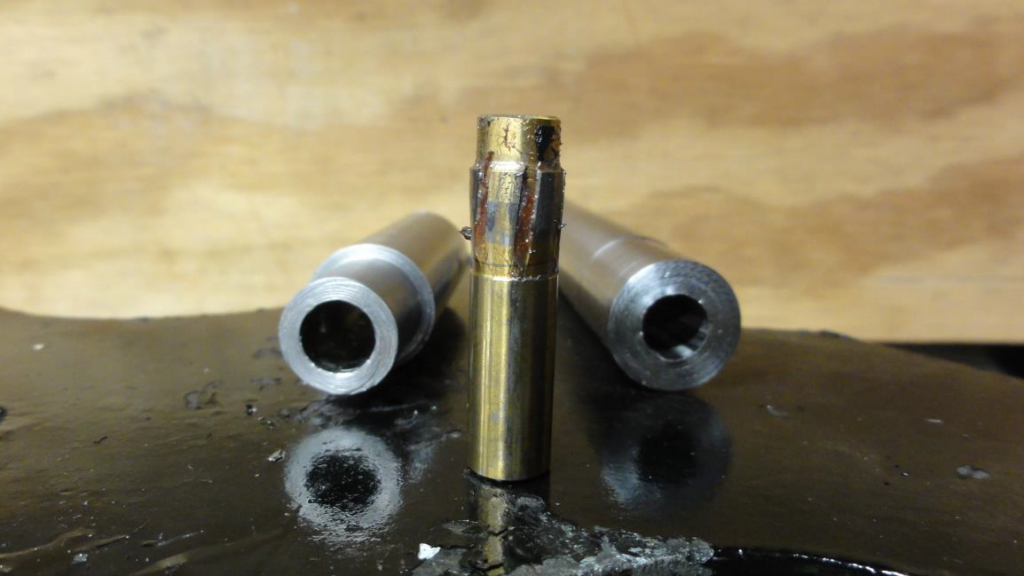
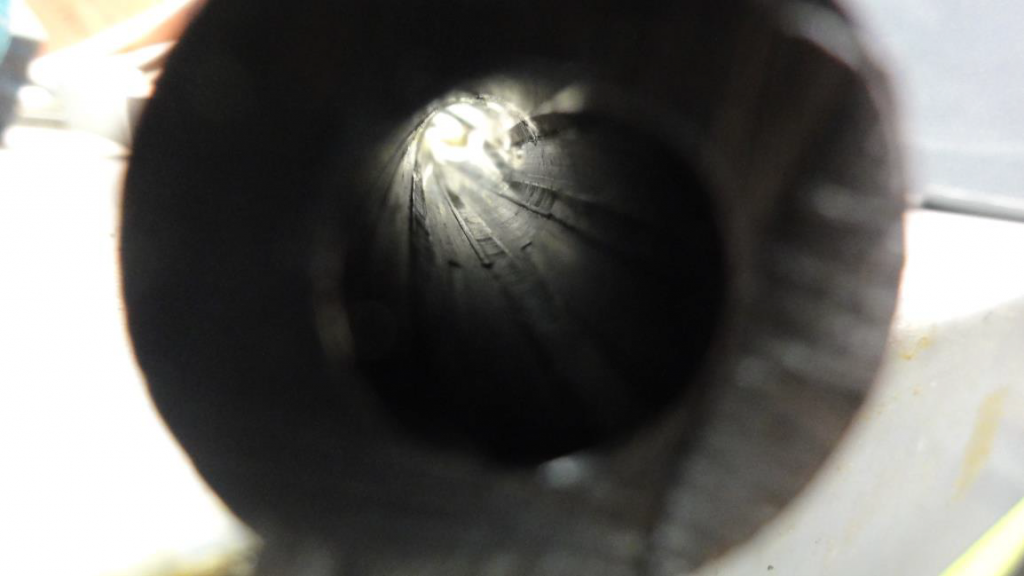
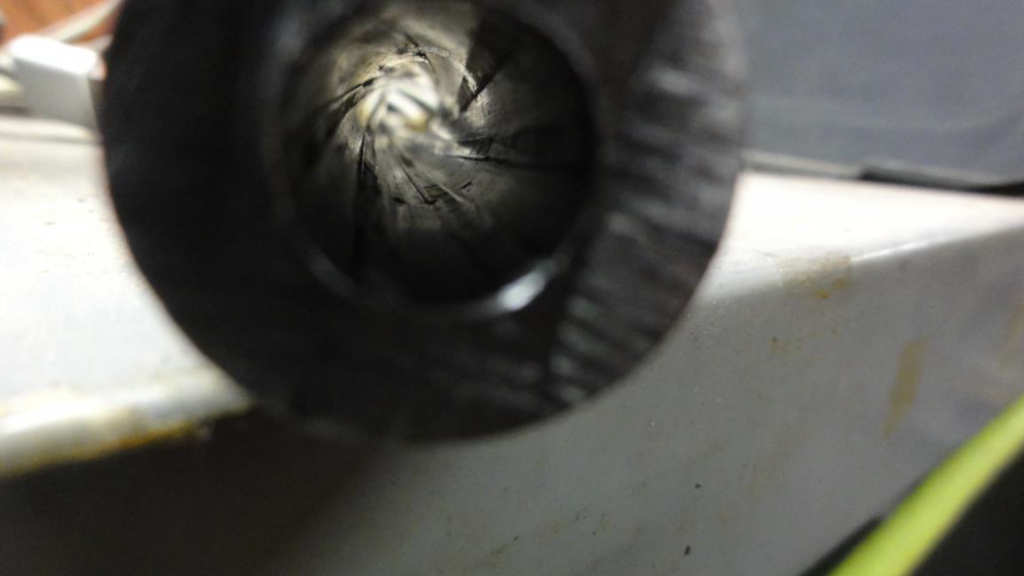
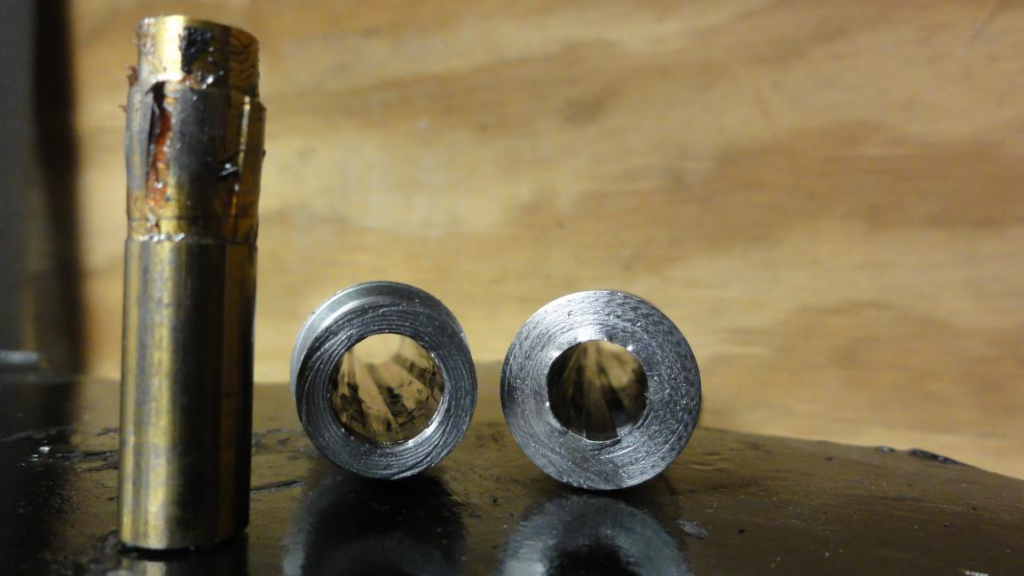
The rifling produced.
There was only about .002 of engagement with the rifling. I decided to push a pulled .380 projectile through to check the engagement.
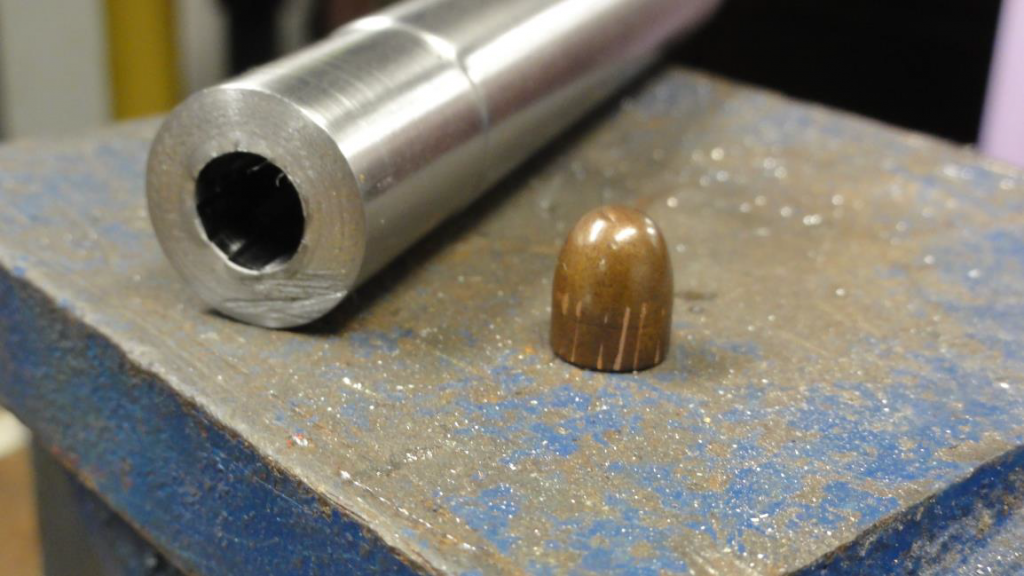

The projectile would not fall through the barrel, which is a good sign. However, I only had to use light taps with a ramrod to get it to pass all the way through the barrel. The projectile should resist more than just light taps as it’s supposed to be digging into the rifling. It appears that the rifling was deep enough to only significantly engage one side. This is not optimal but it’s serviceable enough. Additionally, when a round is actually fired the projectile may expand a little due to the pressure. This should help it engage the rifling a little more.
Conclusion
Coming into this I didn’t have very high expectations, and right off the bat the eBay seller did not inspire much confidence. The lack of technical details didn’t help either, but I bought it understanding that there was a high chance it wouldn’t work at all. As it turned out it actually does work… for 9mm Makarov barrels.
As far as 9mm parabellum barrels go, it may work if you use a .3501 diameter reamer and if the projectile expands when fired. At the very least it will fill the requirements that need to be met for non NFA builds.
All in all this venture was technically successful, but not something I would say I’m satisfied with. Keep an eye out for more gunsmithing articles, as I will be trying out further buttons and methods!


Great timing for this as I just purchased an 11.43mm button to do the very same for a 45 Colt barrel. Same as you, the dimensions were large (0.448” pilot with approximately 0.465” groove diameter). It occurs to me as possibly made for a 45 caliber rifle barrel (0.457”) rather than pistol. I don’t think there’s a similar eastern bloc caliber, right?
Both situations make me wonder if there’s a misunderstanding on the process as well since SAAMI dimensions are available for all calibers these days. Maybe a 5.56 would tell the tale since that’s got to be standard. In any case, I wish there was a little more information available about pilot hole sizes and spring back for these kinds of things.
Awesome effort – look forward to future updates!
Steve
is it possible that the barrel ended up slightly oversize because it needs to be stress relieved it in order to have the bore spring back slightly tighter and a better fit for the intended 9mm. i have seen references to heating button rifled barrels in a 500-550 degree oven to release the stress of forming the rifling, followed by lapping the barrel
Hi there!
I´ve one noob question:
Have you reamed all the way through the barrel or just to fit o rifiling button pilot?
Cheers mate!
Ream all the way through the barrel so that the bore is a single diameter (this will change depending on what cartridge you’re making it for). The button has a pilot so you shouldn’t need to make one in the barrel. Cheers!
Thank you a lot mate!
Few questions
Can you give me anymore detail on reaming?
Looking at 5.56 should the ream be slightly bigger than the pilot ?
The pilot is 5.56 at the widest point.
Also how much material should you be taking off with a ream?
My barrel has a 5.5mm hole atm.
Appreciate your help
Hi. I am trying the ukranian for 9mm for my first rifling experience. I am getting the button + 24mm ext diameter rod. After rifling i’ll reduce the barrel to 16mm external diameter with a lathe. Any opinion on my process? Cheers
That’s right, make the hole 8.75mm, and a lot of lubrication and press.
what steel grade do you use?
Thanx for anwering. 85/90 hra
I have tried the Chinese riffling buttons before, but I can NOT recommend them. They broke after 2 attempts. So i looked around and came across thid website called Hammerbutton.com . At first I was a bit skeptical because I have never heard of it but I contacted the guys via email and he was very helpful and great communication skills. After I had asked a few questions I went ahead and placed my order. I ordered the .32acp riffling button and chamber reamer combo.
A few weeks later, my order came in the mail!
I went straight back home and couldn’t wait to try them out.
First i used the chamber reamer, added some cutting oil and started reaming. After some minutes my chamber was ready and I tested it by putting a factory .32acp round to see if the measurement is right, and it was spot on!
Than came the exciting, riffling!!
I had recently bought a 6 toon hydraulic press, I didnt want to use a hammer because that would result in ugly riffling. So I did like the guys at Hammerbutton.com told me, used a lot of lubrication on the button and started pressing. After maybe 10 minutes I had a riffled and chambered .32acp barrel made at home in my room 🙂
I de-greased the barrel and ran a bore snake through it and I couldn’t believe my eyes. The barrel looks absolutely gorgeous 😍
I will never go anywhere near those Chinese buttons anymore!
Thanks Hammerbutton.com 😊 🙏
Here are the results!
https://imgur.com/a/X6q1hPN
I bought the Ukrainian button on ebay as in the photo in the post, could not ask for better than this. I ordered the .32 acp set that includes a Riffling button aswell as a chamber reamer, both worked great. Results made me really suprised as the riffling looks almost factory made.
I really recommend anyone to buy from these guys, great products and very good communication, seller was more than happy to answer any of my questions.
The Chinese riffling buttons from Aliexpress are tripe and waste of money.
It would be cool if you could test the engagement with .35 caliber airgun pellets such as the JSB 81grain.